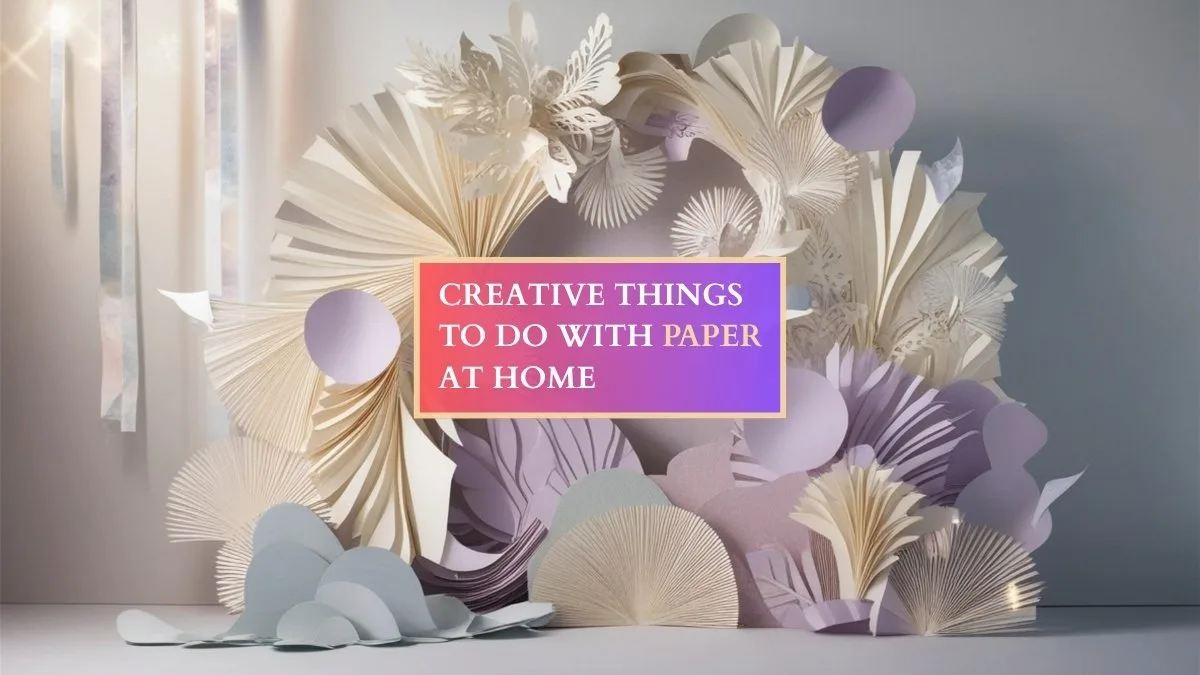
Paper is one of the simplest and most versatile materials you can use to spark creativity at home. With just a few sheets, you can turn ordinary moments into fun, relaxing, and imaginative experiences. If you’re looking for creative things to do with paper at home, there are endless ideas that go far beyond basic crafts.
From DIY decorations and handmade gifts to artistic projects and brain-teasing activities, paper can be used in surprisingly creative ways. In this guide, you’ll discover a variety of creative things to do with paper at home that are easy to try, budget-friendly, and perfect for both kids and adults who want to explore their creative side. ✂️
Why Paper Is One of the Best Creative Materials at Home
Paper is the most accessible creative material in existence. A single A4 sheet costs less than one cent. It cuts, folds, tears, layers, paints, prints, burns, and sculpts. The creative things to do with paper at home span a range from 10-minute beginner projects to weeks-long bookbinding or paper architecture builds. Research from the University of Tokyo found that origami practice specifically improves spatial reasoning, fine motor control, and sustained attention in adult participants.
Paper-based creative work more broadly produces the same psychological benefits as other creative activities: reduced cortisol, improved mood, and the satisfaction of a tangible finished object. Everything in this guide uses materials you either already own or can source for under $20.
Paper Projects – Creative Things To Do With Paper At Home
The best creative things to do with paper at home include origami folding, hand-cut paper art, bookbinding, watercolour painting on paper, making paper flowers, journaling, linocut printing on paper, collage making, papier-mâché sculpture, and building paper architecture models. Most projects need only paper, scissors, and glue.
| Project Type | Skill Level | Materials Cost | Time Needed |
|---|---|---|---|
| Origami | Beginner to advanced | $0-$10 | 15 min to several hours |
| Collage | Beginner | $0-$15 | 1-3 hours |
| Paper flowers | Beginner to intermediate | $5-$15 | 1-3 hours |
| Bookbinding | Intermediate | $10-$25 | 2-4 hours |
| Linocut printing | Intermediate | $15-$30 | 2-4 hours |
| Papier-mâché | Beginner | $0-$10 | Multiple sessions |
| Paper cutting (kirigami) | Intermediate | $0-$10 | 1-3 hours |
| Watercolour on paper | Any | $10-$30 | 1-3 hours |
Creative Things To Do With Paper At Home: The Full List
Folding Projects
1. Origami
Origami is the Japanese art of paper folding and one of the most well-documented creative things to do with paper at home. It requires no tools beyond a single sheet of paper per model and access to clear instructions.
The modern origami canon was largely established by Akira Yoshizawa (1911-2005), who created over 50,000 models and developed the standardised notation system used in all origami instruction books today. His diagrammatic system uses dashed lines for valley folds and dot-dash lines for mountain folds.

Good origami projects by skill level:
- Crane (Tsuru) – The most iconic origami model, requiring 25-30 folds. Takes 10-15 minutes for a beginner and about 3 minutes with practice. Uses a single square sheet.
- Kusudama flower ball – A decorative modular ball assembled from 60 individual paper units. Each unit takes 2-3 minutes to fold. The finished ball takes 2-3 hours total.
- Yoshizawa’s butterfly – A 15-fold model producing a delicate, naturalistic butterfly. Takes 20-30 minutes.
- Modular icosahedron (Sonobe units) – A geometric 3D form assembled from 30 identically folded units. Takes 1-2 hours.
- Wet-folding animals – A technique where dampened paper holds curved shapes impossible with dry folding. Produces sculptural animals with organic form.
Free origami diagrams: Origami-fun.com and the British Origami Society website (britishorigami.org) both publish free step-by-step diagrams for hundreds of models. The book Origami Design Secrets by Robert Lang (A K Peters, $35) covers advanced mathematical design for those who want to design their own models.
Paper for origami: Standard 15x15cm origami squares cost around $5-$8 for 100 sheets. Washi paper (Japanese tissue paper) costs $10-$20 for a pack and produces more refined results for advanced models.
2. Kirigami (Paper Cutting and Folding)
Kirigami extends origami by adding cuts to the folding process. The name combines the Japanese words for cut (kiru) and paper (kami). The most popular kirigami form is the pop-up card, which uses a combination of folds and cuts to produce three-dimensional structures when a flat card is opened.
Basic kirigami skills to learn in order:
- Simple symmetrical snowflake cuts from folded paper (fold square in thirds, cut triangles from edges, unfold)
- One-cut pop-up boxes inside a folded card
- Staircase pop-up mechanisms
- 180-degree floating platform pop-ups
- Full architectural pop-up scenes
The book Cut and Fold Techniques for Pop-Up Designs by Paul Jackson (Laurence King Publishing, $25) covers all fundamental mechanisms with clear diagrams. YouTube channels including Haruki Nakamura’s page and Paper Kawaii both demonstrate kirigami techniques in real time.
Materials: A bone folder ($5-$8) makes crisp fold lines and significantly improves kirigami results. A self-healing cutting mat ($15-$20) and a craft knife ($5-$8) replace scissors for cleaner cuts on intricate designs.
3. Modular Origami and Geometric Sculpture
Modular origami uses multiple identical units folded separately and assembled without glue into geometric forms. The Sonobe module, developed by Mitsunobu Sonobe in the 1960s, is the most versatile unit and assembles into forms ranging from a simple cube (6 units) to a spiky icosahedron (30 units) to a large stellated sphere (270 units).
Building a 30-unit Sonobe icosahedron:
- Cut 30 squares of paper, all the same size (7x7cm works well)
- Fold each unit using the standard Sonobe diagram (about 6 folds per unit)
- Assemble units in groups of three to form pyramidal points
- Continue adding units until all 30 are connected
- The finished form is self-supporting with no glue required
The mathematical basis of modular origami connects directly to the five Platonic solids. Erik Demaine at MIT, one of the leading origami mathematicians, publishes free research papers on computational origami at erikdemaine.org.
Cutting and Construction Projects
4. Paper Collage
Collage is one of the most open-ended creative things to do with paper at home because it requires no drawing ability and produces results directly from the materials you assemble. The Dadaist and Surrealist movements of the early 20th century elevated collage to a serious art form. Romare Bearden, Henri Matisse in his later years, and contemporary artist Wangechi Mutu all built significant bodies of work around paper collage.
Starting a paper collage practice:
- Source materials: Old magazines, newspapers, music scores, maps, wrapping paper, tissue paper, receipts, and printed photographs all work. The Ephemera Society (ephemerasociety.org) and antique markets are good sources for vintage printed material.
- Adhesives: PVA glue diluted 50:50 with water produces a clean, flat bond. Mod Podge ($8-$12) works as both adhesive and sealant. Glue sticks work for quick assembly but yellow over time.
- Substrate: Heavy card or watercolour paper ($8-$15 for a pad) works better than standard printer paper, which buckles when wet glue is applied.
Collage project formats:
- Portrait collage using only typographic elements from newspapers
- Landscape collage using colour fields cut from magazine pages
- Narrative collage building a visual story from unrelated images
- Abstract texture collage using torn rather than cut paper edges
- Map collage combining sections of different maps into a fictional geography
5. Paper Cutting Art (Scherenschnitte)
Scherenschnitte (German for scissor cuts) is a folk paper cutting tradition dating to 16th-century Switzerland and Germany. It produces intricate symmetrical designs cut from a single folded sheet. Contemporary paper cutting artists including Rob Ryan and Maude White have developed the tradition into gallery-level work.
Tools needed:
| Tool | Use | Cost |
|---|---|---|
| Swann Morton craft knife with 10A blade | Fine detail cuts | $8-$12 handle plus $5-$8 blades |
| Self-healing cutting mat A3 size | Protects surface, guides cuts | $15-$25 |
| Light box or bright window | Tracing designs onto paper | $20-$40 for a light box |
| Black card or paper | Traditional base material | $5-$10 for a pack |
| Repositionable spray adhesive | Mounting design on backing | $8-$12 |
Beginner paper cutting process:
- Print or draw a symmetrical design on standard printer paper
- Use repositionable spray adhesive to stick the design to your cutting paper
- Cut inside spaces first, working from the centre outward
- Remove the printed design layer after cutting is complete
- Mount on contrasting backing paper using the spray adhesive
The Paper Cutting Book by Natalie Guerlach (Lark Books, $20) and the YouTube channel of Bovey Lee demonstrate both traditional and contemporary approaches.
6. Build Paper Architecture Models
Architectural paper modelling uses printed and scored card to construct scale models of real or imaginary buildings. It is one of the most technically satisfying creative things to do with paper at home for adults who enjoy precise, methodical work.
Two approaches:
Papercraft architectural kits: Pre-printed and pre-scored card sheets that assemble into specific buildings. Brands including Papercraft Inspirations and UGears produce kits for $15-$35 covering world landmarks, historic houses, and geometric abstract forms.
Freehand architectural modelling: Using heavy cartridge paper (200gsm), a ruler, craft knife, and bone folder to design and build original structures. This requires understanding of how flat sheets convert to three-dimensional forms through scored fold lines and tab-and-slot joining.
Skills to build in order:
- Score and fold a clean right-angle box with fitted lid
- Build a simple house form with pitched roof
- Add window and door openings cut with a craft knife
- Construct a cylindrical tower using a rolled and taped paper form
- Combine multiple forms into a small architectural scene
7. Make Paper Flowers
Paper flowers range from simple 10-minute crepe paper roses to elaborate botanical recreations that take a full day per stem. They make durable decorative objects and use materials that cost a fraction of real flowers.
Crepe paper is the best material for realistic flower-making because it stretches when pulled gently across its grain, allowing petals to be shaped into curved, organic forms. Italian crepe paper (180gsm from suppliers including Temeperley London’s craft shop) produces the most realistic results. Standard craft crepe paper ($3-$5 per roll) works well for beginners.
Paper flower projects by complexity:
- Simple tissue paper pom-poms – Stack 8-10 sheets of tissue paper, fold accordion-style, bind the centre with wire, and fan out the layers. Takes 10-15 minutes per pom-pom.
- Crepe paper roses – Cut petal shapes from crepe paper, stretch each petal gently to cup it, and wrap petals around a wire stem with floral tape. Takes 30-45 minutes per rose.
- Giant paper peonies – Layered crepe paper petals assembled from largest to smallest around a tissue paper centre. Takes 1-2 hours per bloom.
- Botanical specimen flowers – Exact reproductions of specific species using layered crepe paper with painted detail. Takes 3-6 hours per stem.
The book Petal by Petal by Susan Beech (Storey Publishing, $25) covers crepe paper techniques with botanical accuracy.
Printing and Painting on Paper
8. Linocut Printing on Paper
Linocut is a relief printing technique where you carve a design into a linoleum block, ink the raised surface, and press it onto paper. The result is a bold, graphic printed image that can be reproduced multiple times from one carved block.
A basic linocut kit costs $15-$30 and includes:
- Soft-cut linoleum blocks or mounted lino sheets
- A set of carving gouges (V-tools and U-gouges in multiple widths)
- Water-based block printing ink ($8-$12 per tube)
- A brayer (roller) for inking the block
- A wooden spoon or baren for pressing paper onto the inked block
The printing process:
- Draw or trace your design onto the lino block with a pencil
- Carve away the areas you want to remain white (the ink stays on raised areas)
- Roll a thin, even layer of ink across the block surface with the brayer
- Lay paper over the inked block and press firmly with a spoon or baren
- Peel back the paper to reveal the print
Japanese baren tools ($15-$25) produce more even pressure than a wooden spoon and improve print quality significantly. Speedball produces reliable beginner linocut sets available at most art supply shops and Amazon.
9. Watercolour Painting on Watercolour Paper
Watercolour paper is not a passive surface. The weight (gsm), texture (hot-press smooth, cold-press medium, rough), and fibre content (cotton versus wood pulp) all directly affect how paint behaves. Using proper watercolour paper transforms the results of even basic painting.
Paper specifications:
| Paper Type | Weight | Surface | Best For |
|---|---|---|---|
| Fabriano Artistico | 300gsm | Cold press | General watercolour work |
| Arches | 300gsm | Hot press | Fine detail, botanical illustration |
| Saunders Waterford | 300gsm | Rough | Loose, expressive work |
| Canson XL | 200gsm | Cold press | Practice and learning |
At 300gsm (140lb), watercolour paper does not need stretching before use. Lighter paper (90gsm) buckles when wet and needs to be stretched by soaking in water, then stapling to a wooden board before painting.
Free watercolour instruction: YouTube channels including Mind of Watercolor (focussed on botanical work), Scratchmade Journal (everyday objects), and Shibasaki (Japanese watercolour techniques) all provide structured beginner to intermediate teaching at no cost.
10. Marbled Paper
Paper marbling is a centuries-old technique producing swirled, wave-like patterns by floating oil-based or acrylic inks on a water or carrageenan size, manipulating the pattern, and laying paper onto the surface to transfer the design.
Traditional marbling uses:
- Carrageenan size: Powdered carrageenan ($8-$12) dissolved in water creates a viscous surface that suspends floating inks
- Oil marbling inks or acrylic inks thinned with ox gall ($10-$15 per set)
- A shallow tray large enough for your paper size
- Combs, styluses, or skewers to manipulate patterns
The basic Turkish slab pattern (the most common marbling design) is made by:
- Dropping inks in sequence onto the size surface
- Drawing a wide-tooth comb through the inks in parallel stripes
- Drawing a fine comb at 90 degrees to the first direction
- Laying paper flat on the surface and lifting cleanly
- Rinsing excess size from the paper under running water
Marbled paper works as book endpapers, gift wrap, card making, and framed art. The book The Art of Marbling by Sandra Millington (Search Press, $18) covers all major pattern styles.
Journaling and Writing Projects
11. Bookbinding and Making Your Own Notebooks
Bookbinding is the most functional of all creative things to do with paper at home because it produces objects you actually use. The Coptic stitch binding and the Japanese stab binding are both learnable in an afternoon and require no special equipment beyond a needle and waxed linen thread.
Japanese stab binding (simplest method):
- Gather 40-60 sheets of text-weight paper (80gsm standard printer paper works)
- Add a heavier card cover front and back
- Clamp the stack and punch 4 holes through all layers near the spine, 1cm from the edge
- Thread waxed linen through the holes in a specific pattern (diagrams at bobbins-and-buttons.blogspot.com)
- Knot and trim the thread end at the final hole
The finished notebook is functional immediately. Total cost: under $5 for materials using printer paper and recycled card covers.
More complex binding styles:
| Style | Binding Type | Best For | Difficulty |
|---|---|---|---|
| Coptic stitch | Exposed spine | Sketchbooks, journals | Intermediate |
| Long stitch | Visible thread pattern | Art journals | Intermediate |
| Saddle stitch | Simple pamphlet | Zines, small booklets | Beginner |
| French link stitch | Flexible multi-section | Large notebooks | Advanced |
| Case binding (hardback) | Traditional book | Presentation notebooks | Advanced |
12. Make a Handmade Paper
Making paper from scratch is one of the most satisfying creative things to do with paper at home because the output is entirely unique. Handmade paper can include flower petals, leaves, seeds, or fibres embedded in the sheet.
Basic papermaking supplies:
- A mould and deckle (wooden frame with mesh screen): $15-$25, or make your own from picture frames and window screen mesh
- A large tub or washing up bowl
- Scrap paper (newspaper, printer paper, tissue paper) for pulp
- A blender for pulping ($15-$25 second-hand)
- Absorbent fabric or felt for couching (transferring wet sheets)
The papermaking process:
- Tear scrap paper into small pieces and soak in water for 2-4 hours
- Blend soaked paper with water until smooth pulp forms
- Pour pulp into the large tub of water (1 part pulp to 10 parts water ratio)
- Submerge the mould and deckle, then pull up through the pulp in a level horizontal motion
- Allow water to drain through the mesh, then couch the wet sheet onto fabric
- Press between fabric layers and allow to dry flat for 24 hours
Creative Things To Do With Paper At Home: By Materials You Already Own
| Materials Available | Best Projects |
|---|---|
| Just printer paper | Origami, kirigami pop-ups, paper cutting, booklets |
| Printer paper plus scissors and glue | Collage, paper flowers (tissue paper), simple sculpture |
| Magazines and newspapers | Collage, papier-mâché, marbling practice sheets |
| Watercolour paints and paper | Watercolour painting, hand-painted wrapping paper, greeting cards |
| Old books or notebooks | Altered book art, bookbinding practice, decoupage |
Creative Things To Do With Paper At Home: By Time Available
| Time | Best Paper Projects |
|---|---|
| 15-30 minutes | Simple origami crane, tissue pom-pom, greeting card, quick collage |
| 1-2 hours | Modular origami, kirigami pop-up card, linocut print (simple design), paper flowers |
| 2-4 hours | Bookbinding project, marbling session, watercolour studies, paper cutting artwork |
| Half day or more | Modular sphere (30+ units), botanical paper flower, handmade paper sheets, architectural model |
FAQs: Creative Things To Do With Paper At Home
What are the easiest creative things to do with paper at home for absolute beginners?
Simple origami models like the crane or boat, tissue paper pom-poms, basic collage from magazine cuttings, and Japanese stab-bound notebooks all suit complete beginners. Each requires under $5 in materials and produces a finished result within one session. No drawing ability or prior craft experience is needed for any of them.
What paper is best for creative projects at home?
Use 80gsm printer paper for origami and booklet making. Use 200-300gsm cartridge paper or watercolour paper for painting and collage bases. Use 120-160gsm card for kirigami and paper cutting. Crepe paper for flowers. Each paper weight serves different purposes. Buying a mixed-weight paper pack from an art supply shop covers most projects for $10-$15.
How do you store and display finished paper art at home?
Flat paper art stores best in a portfolio case or between acid-free sheets in a drawer. Three-dimensional work like origami or paper flowers displays well in a glass case or shadow box to protect from dust. Frame flat work under UV-protective glass to prevent fading. Never store finished paper art in direct sunlight or damp conditions.
Are creative things to do with paper at home suitable for children and adults together?
Yes. Origami, paper flowers, collage, and papier-mâché all scale across age groups by choosing different complexity levels. A child folds a simple boat while an adult folds a modular icosahedron. Both use the same basic material. Paper marbling is especially good for mixed-age groups because the results are immediately impressive regardless of skill.
What tools make paper crafts significantly easier?
A bone folder ($5-$8) makes sharp fold lines in origami and bookbinding. A self-healing cutting mat and craft knife ($20-$30 together) replace scissors for detailed cutting. A brayer ($8-$12) applies even ink for linocut printing. A light box ($20-$40) simplifies tracing designs for paper cutting. None are essential but each produces a measurable quality improvement.
How do you find free patterns and designs for paper cutting and kirigami at home?
Silhouette Design Store (free tier), Cricut Design Space (free tier), and the websites papercutting.co.uk and paperkawaii.com all offer free downloadable templates. Pinterest boards for paper cutting and kirigami contain thousands of free designs. YouTube channels including Su Crafter and NikNak Crafts show real-time paper cutting from beginner through advanced levels.
Conclusion
The creative things to do with paper at home cover a wider range than most people realise, from a 10-minute origami fold to a multi-day bookbinding project, from simple collage to technically precise paper architecture. Paper is cheap, forgiving, and already in your home. The best approach to any of these creative things to do with paper at home is to start with the simplest version of a project that interests you and build from there, rather than waiting until you have the right tools or enough time to do it properly.


Leave a Comment